AUSTIN JOHNSON
ENGINEERING TECHNOLOGY
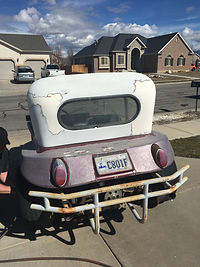
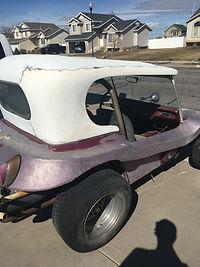
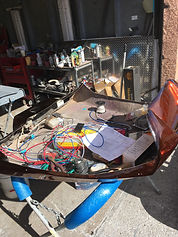
This project being several months before I began taking the edge classes. My father-in-law and I have been talking for a while about doing a project that we had both always wanted to do. He is an auto body mechanic, and I have always been interested in tinkering and building things. We decided we wanted to restore a car together, and we decided on a Volkswagen dune buggy. We search the Internet for a couple months, looking for best dune buggy we could find for the best price we could find. After a long search, we finally came upon a perfect project. We contacted the seller, and went to pick it up at his house. The pictures below are exactly how the buggy looked when we picked it up in his driveway.
When we saw it, we were very excited. However, we also knew that there was going to be a lot of work ahead of us. We knew it had been sitting for two years without being driven, and there was some external work that definitely needed to be done. With high hopes, we towed dune buggy from northern Utah all the way down to St. George in the sunny south.
After some quick assessment, we decided what we knew we would have to fix, and some of the things that we assumed that we would have to fix simply because of the lack of being driven. We also talked about what improvements we would like to make, and which ones we could do with the budget that we had. At that point, we sat down and created the following budget and timeline.
Estimated Costs:
Item Purpose Cost (Max)
Dune Buggy Object to be restored $1200.00
Transportation To obtain Buggy in SLC $60.00
Fuel system components For use in repairing the engine, and gas lines $60.00
Electrical system components For use in repairing the internal wiring $120.00
Structural components In case of needed replacements in the frame or suspension $60.00
Auto body Paint To paint the Buggy $150.00
Cosmetic replacements To change out any unsightly buttons, knobs, materials,
fixtures, etc. and to add several personal additions to
improve the final look. $300.00
Shop supplies Materials such as sand paper, paint thinner, masking materials, etc. $50.00
Labor Time spent working for 2 at $14.00 per hr. for 40 + hrs. $1120.00
Total $3120.00
Timeline:
-
Transport Buggy from Salt Lake to St. George, and begin disassembly on September 1st, 2018.
-
Finish evaluation of all systems by September 15th.
-
Send out parts for plating/chroming by September 19th.
-
Finish fuel system replacements by September 22nd.
-
Finish structural repairs if necessary by September 29th.
-
Place all orders for cosmetic improvements by October 3rd.
-
Finish prepping all parts for paint by October 6th.
-
Finish painting all parts by October 13th.
-
Finish all electrical and rewiring by October 20th.
-
Start reassembly on October 27th.
-
Finish reassembly by November 10th, and run final check.
-
Complete all budget and scheduling adjustments on record by November 24th.
-
Finish any remaining requirements for the project by Dec 1st.
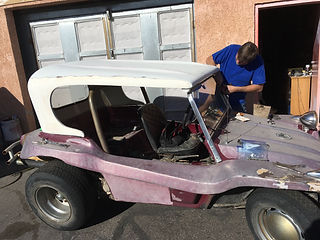
Although it wasn’t perfect, or extremely specific, we began with the tear down to better look at what we had ahead of us immediately instead of waiting until September. At that point I was done with EDGE 3020, and had permission to begin, so we jumped right in.
We began with the roof and disconnected it from the main body of the buggy. While taking it off, we noticed that there was some damage in several places on the roof, and we decided that we would focus on the main buggy, and save the roofer for another time because of the effort required to fix the fiberglass.
The next thing we needed to come out were the seats, so that we could get a better look under the dash. However, after beginning we realize that one of the seats had been welded to the frame, and decided to move the other parts before we started cutting. We moved on to the windshield, and removed it from the main body as well. That allowed us to access the hood of the buggy, which is bolted directly to the windshield frame.
After removing the hood, we found several things. First, was that the gas tank was beginning to corrode and rust. To prevent further damage, We removed it from the buggy, and coated it with a special rust inhibiting paint.
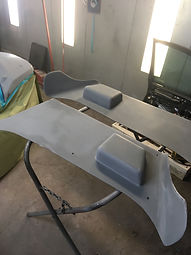
When that was done, we returned to the main body, and began pulling off several of the removable panels on the sides of the buggy. After making some minor repairs to the panels and hood, we prepared them for paint. They went fairly quickly, and we’re ready in about two days.
The main body of the buggy, however took significantly longer to prepare. First, we had to remove the welded in seat, as well as the rollbar that prevents you from getting crushed if the buggy were to roll over while you were driving it. With both of these set aside, we began The preparation by removing all of the removable parts of the inside of the buggy. We removed everything from the dash, to the steering wheel.
Once everything was out, started sanding. There was a lot of sanding required to get the whole body ready to repaint. I have never been more grateful for an electric sander. The next step was the most exciting one of the whole process. All the work we had done until now was tearing things apart, and when you’re doing that you feel a lot like you’re not making any progress. Things seem to be getting worse and worse as you pull out wires and hoses, and bolts. However, as soon as you begin the paint, it begins to feel like all your work has been worth it.
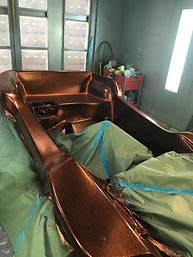
The painting happened in several steps. We began by spraying the buggy with primer that was a dull grayish color.
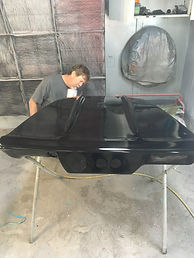
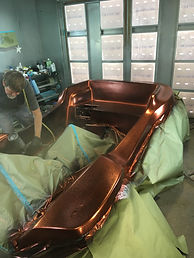
After that, we sprayed the buggy with a base coat of black, and added several layers to make sure it was completely covered.
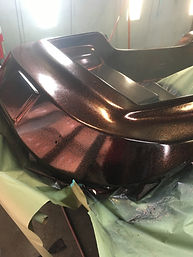
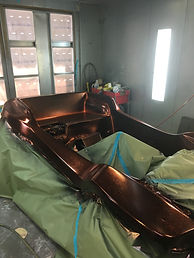
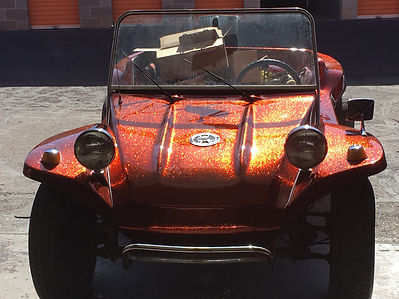
Next, came the color. It took about seven or eight coats to begin seeing the orange that we had envisioned. However, it was worth all the effort.
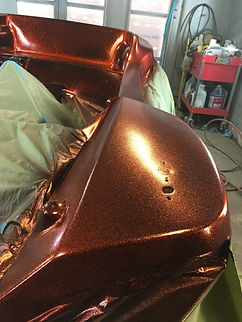
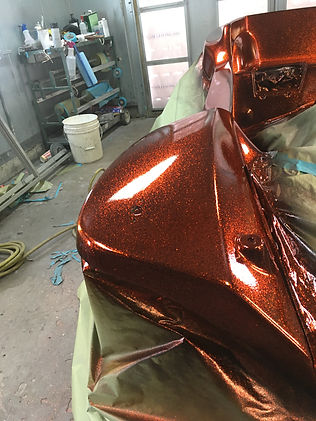
Once we had sprayed on enough color, we added several coats of orange flake. Flake is a paint with small pieces in it that are very similar to glitter, but in specific colors. Ours was a reddish orange flake, and you can see the difference between the original orange, and the orange with the flake.
At that point, it was very exciting to begin seen a glimpse the final product. We finished with several coats of clear paint, to give it a nice shine, and then let the paint set up for several days.
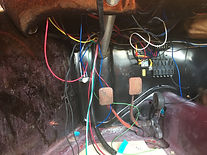
Next, one of the largest tasks we encountered began. The wiring in the buggy when we received it was nothing short of a nightmare. In the pictures below, you can see how tangled, and confusing all the wires were. They had been spliced, and taped together so many times that we could hardly even tell where the wires ran, or what they were for.
After trying in vain for about a day, we decided that it was probably best to just tear out all the wiring, And buy brand new wires, and a wiring loom from Volkswagen itself, and start from scratch. The wiring ended up taking a majority of the time we worked on the buggy all by it’s self. However, when we were done, we were very proud of what we had done, and it looked infinitely better than I had before. The best part was, everything ran like it was supposed to.
I think I learned the most during this phase, because I got to see how everything connected, and in what order the car performed its functions. Seeing the map of wires really helped everything to make sense.
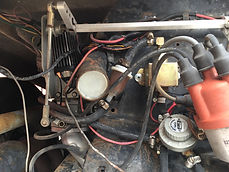
Next, we moved on to the fuel lines. We noticed that several of the lines for cracked, and would leak gas when we tried to start the car Engine. You were placed all the hoses for the fuel system, and ended up needing to buy a new fuel pump, and relocate it. Previous fuel pump had been located right next to two of the fuel lines.If you think about it for a minute, placing an electric fuel pump directly next to any fuel line is really not great idea. We were glad we caught it, and though replacing the fuel system wasn’t super enjoyable, we were glad that we had, what may have been a major problem.
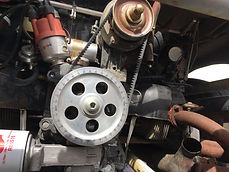
The next challenge, was getting the engine to run. Because the car had been sitting for two years, there was a lot of leakage from cracked seals in the engine, and exhaust system. We ended up having to tear the carburetors apart, clean them out, and put all new seals on them. We ended up enlisting the help of one and my father-in-law‘s good friends, Deray, to help us do that. Neither of us are super knowledgeable about carburetors, so he did most the work on those and when they came back they worked perfectly.
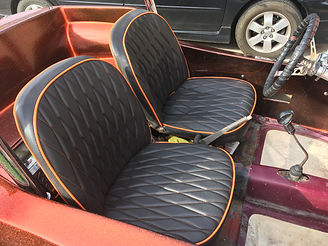
When we finally finished the engine, and the fuel tank, and electrical were all completely done, we began reassembly. At this point, we begin adding the improvements that we had planned. First, we had the seats sent out to be recovered. The leather when we had received them was cracking, and very uncomfortable. We picked a slightly more flashy pattern, with some orange in it to match the buggy.
We also took the rollbar out of the main body, and send it out to be chromed. One of the things that my father-in-law and I both agree on it is that shinier is better. We like chrome.
We replaced all the dials in the dash, the steering column, the battery box, the headlights, taillights, license plate cover, gas tank, and hubcaps. It was a lot of nimble fingers work, but eventually we got it all in, and it made all the difference.
Finally, we replaced the side panels that we had removed, and buffed the whole buggy to make it really shine. We spent several days fine-tuning, and making small adjustments to get buggy just right after that. When we finally felt like we were done, we couldn’t have been more proud of the final product. There is nothing quite like the feeling of driving down the road it’s something you helped to build, and having people stare after you probably thinking to themselves just how awesome it looks. I can definitely say that this project was worth all the work, and all the trouble. At the conclusion of the project, I compiled my budget, and timeline, and put them together as best I could. I was happy to see that we had done a fairly good job on those as well. Here are the final versions of the budget, and the timeline. I really hope that you enjoyed seeing this project, and think that’s highly of the final product as I do.